IngredientsI LOVE the way my skin feels after getting a manicure or pedicure. It's so soft, supple, and gorgeous! Now, you can have that same feeling at home. I know, I know, "But I don't have the time!" Here's the thing...you do! This sugar scrub is super easy and only takes minutes to make. 3 tea bags of choice (chamomile or lavender work wonderfully) 1 cup of coconut oil (or any other carrier oil, I just love coconut!) 2 cups of sugar (or one of sugar and one of salt) 5-10 drops Lavender Essential Oil Directions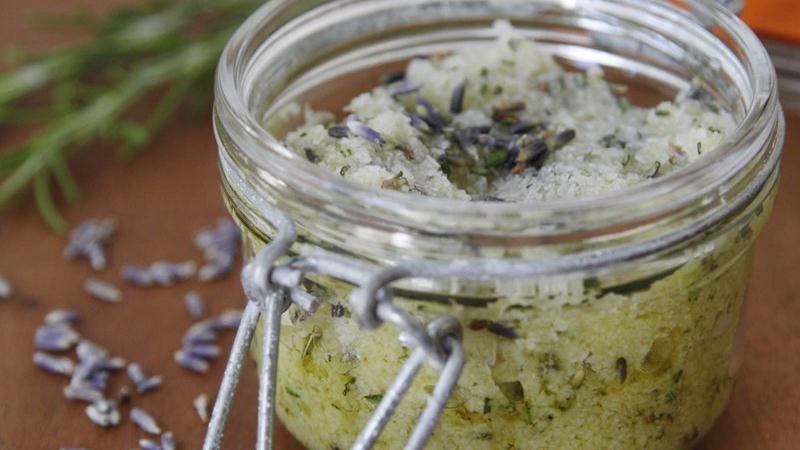 Mix together the dry ingredients (sugar, tea from inside the tea bags, and essential oil)
Melt coconut oil in the microwave (skip this step if you're using a different oil) Slowly mix in the carrier oil and stir until it's fully combined Store in an airtight container of choice
0 Comments
Want to strengthen your nails? Grab some extra virgin olive oil and rub a dab into your nails every day. This will add the needed nutrients to your nails while smoothing them and adding a just-buffed gleam.
Oh, Those Pesky Breakouts!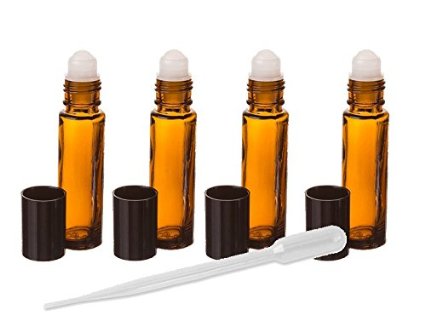 Clear skin is beautiful skin. The only problem is...well, getting clear skin. I have had oily skin all my life (I really doubt that it will be changing any time soon) and I've had to deal with annoying breakouts. They always choose the BEST times to show up. Before a dance, before a wedding, before taking family pictures. Lucky for you, I have a little secret up my sleeve! This recipe is super simple and requires less than TWO minutes to make. Blemish Erasing Roller BottleINGREDIENTS: 1 10mL roller bottle (these can be purchased empty on Amazon) 20 drops Lavender Essential Oil 20 drops Tea Tree (Melaleuca) Essential Oil Carrier Oil (I prefer fractionated coconut oil for this. If you want to choose a different one, check out my post on Choosing the Right Carrier Oil under the Essential Oils tab) DIRECTIONS: Add the essential oils to your roller bottle Top off with your choice of carrier oil Pop in the roller and tighten the cap to ensure that the roller is fully in place. Apply to blemishes as needed. Keep out of direct sunlight and heat. Do you have an essential oil blend that banishes breakouts? Share it in the comments below!
Bentonite clay is one of the seven types of clay that are formed from volcanic ash. This clay is classified as a healing clay; healing clays have been used in cultures all throughout history for their detoxification abilities. Bentonite clay, being as awesome as it is, is useful for both internal and external detoxification. The trick is knowing which type to use for which purpose. There are two types of Bentonite clay: 1. Sodium Bentonite 2. Calcium Bentonite Sodium bentonite clay is mainly used for industrious work, making it a not so desirable option for the use in beauty routines. However, there are some companies out there, such as Mountain Rose Herbs, who provide a Sodium bentonite clay that is awesome for the use on skin. Make sure to do some research and see if this type is right for you! Calcium Bentonite clay, on the other hand, is the stuff you want. A good quality Bentonite clay should be a grey or cream color. Be cautious of anything bordering a pure white color, chances are it isn't what you want. This clay can be mixed with water (or any drink, I suppose) and taken internally for detox purposes. However, I use it for the magic it makes when it's used externally. Bentonite clay contains a strong negative charge which bonds with the positive charge of most toxins, making it great to use for detoxification purposes. However, this also means that this clay should at no point ever come into contact with any metal. The metal will neutralize the negative charge making your clay essentially useless. Make sure to use plastic! Now, because I love diagrams and because I couldn't have said it better myself, here is an awesome visual I found thanks to undergroundhealthreporter.com: What It Is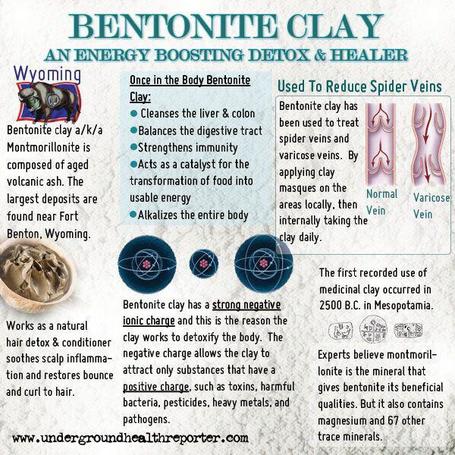 Uses of Bentonite ClayWhat I RecommendThere are a TON of uses for Bentonite clay. With the explosion of DIY on the internet, new uses are being discovered everyday. Just to get you started, here are my top three favorite uses for Bentonite clay: 1. Skin Poultice - Apply a thick layer of clay mixed with water to bug bites, stings, burns, blemishes, or cuts. For extra oomph, apply a thick layer of the clay mixture and cover with a damp cloth and change it every two hours. 2. Detox Bath - Apply 1/4 cup of dry clay to your bath water. Make sure to drink plenty of water before you do this, and maybe bring a bottle with you while you steep for 15-20 minutes. Make sure the water is hot (you're detoxing!) and you can even add a few drops of your favorite essential oil, like Lavender, for a more relaxing experience. 3. Face Mask - Mix 1 tsp. Bentonite clay with either water or Apple Cider Vinegar (use this for use on acne!) and apply generously to the face. Let sit 15-20 mins. You face may feel itchy while the mask is drying, this is completely normal. The clay is pulling all of the toxins out of your skin! Keep in mind, your face will be red for 20-30 mins. after you rinse of the mask. This is normal too, I swear! The list can go on and on. Bentonite clay can be used in soaps, deodorants, and even homemade makeup. What's your favorite use for Bentonite clay? Post it in the comments below! 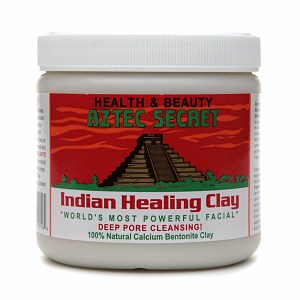 There are a ton of different brands out there, all claiming to be the best. I've tried a fair few of them and this one is definitely my favorite. Not only is it high quality, it doesn't put a dent in my wallet either. Want to try it out for yourself? Here's a link to it on Amazon, just copy and paste it into your browser!
http://www.amazon.com/Aztec-Secret-Indian-Healing-Cleansing/dp/B0014P8L9W/ref=sr_1_3?ie=UTF8&qid=1432945952&sr=8-3&keywords=bentonite+clay RoutineHumans are creatures of routine. We take the same roads to work everyday. We eat meals around the same time. We walk our dogs along the same stretch of sidewalk in our neighborhoods. We go to the beach every summer. Why should our routine for skin care be any different? I'll admit, I was guilty of skin care ADD once upon a time. I'd try one cleanser and then jump to another when the first failed to provide adequate results. I was guilty of skipping routine altogether. I'd only wash my face and do nothing else. I'd wash my face and use harsh creams. All to no avail. My skin was TERRIBLE. That is, until I went natural. So, here is the routine that saved my skin: 1. Wash 2. Apply Toner 3. Moisturize I know. Super simple, right? These three easy steps are what made my skin so much healthier. Well, these steps combined with completely different skin care products. Oh, and the routine of doing this every morning and night. Routine is super important if you want to save your skin! Skin Care Products MatterThe products that you use on your skin really matter. I've used everything. When I say everything, I mean it. I went through most of my teenage years using harsh, chemical ridden cleansers from the drug store. I bought into what they were selling wholeheartedly. I convinced myself that this product would be the one to work for me every time I spent north of $15 on a bottle. Oh, was I wrong. I used gel cleansers, cream cleansers, cleansers with 'energizing beads', foaming cleansers, and cleansing pads. Here's the thing, though. I have SUPER sensitive skin. I needed something that wasn't so harsh. I was looking in ALL the wrong places. Luckily, I finally struck gold and discovered what works best for me. I needed something that was both gentle and natural, and I found it. Here's what I use: 1. Coconut Oil or Honey 2. Witch Hazel 3. Homemade Moisturizer Here's What I Do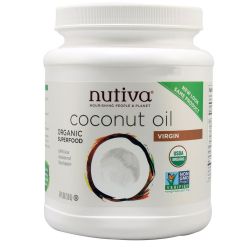 Cleansing with honey requires less work. I use an all natural, raw honey for this. All you do is wet your face and use the honey as you would any other cleanser. Work it into the skin and rinse. Honey is a great option because it has antibacterial properties and helps to balance the oil in your skin. As an added bonus, honey has healing properties. This will come in handy if you want to heal old acne scars, sunburn, or chapped skin. Step 1: Cleanse For this step I choose one of two methods. I can oil cleanse or wash my face with honey. Either is a great option. For oil cleansing, I use my trusty coconut oil. This stuff is incredible. It has antibacterial properties and it heals and moisturizes my skin while it's cleaning it. That's a win-win all around. Don't know what oil cleansing is? I'll be making a post on it later, stay on the lookout! 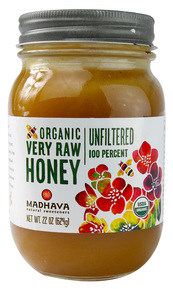 Step 2: Apply Toner For this step, I use witch hazel. I absolutely love this all natural toner. It cleans the skin, tightens the pores, and helps with clearing breakouts. Not to mention, the one that I use smells incredible. 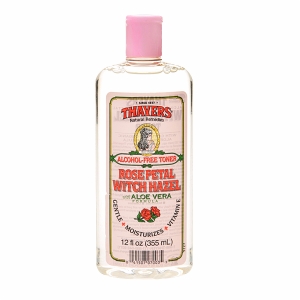 Step 3: Moisturize For this step, I choose to use a moisturizer that I have made myself. It is a mixture of coconut oil, aloe vera gel, and a few choice essential oils. I'll be putting up a DIY recipe for it soon. You can also use just coconut oil, any other moisturizing oil, or any other natural moisturizer. 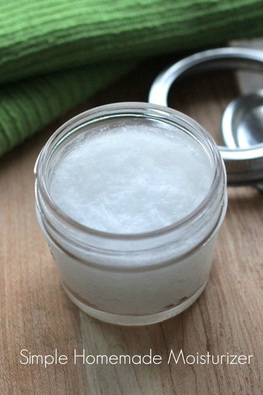 So, there you have it. That's how I keep my skin healthy and clear. Routine and natural products. Do you have a skin care routine that works really well for you? Share it in the comments below!
|
